NestJS — Create a CRUD API using TypeORM and PostgreSQL
Learn how to build a CRUD REST API application using NestJS, TypeORM and PostgreSQL by creating a To-Do List API
![]()
In this post I want to show you how I set up my NestJS projects and we will learn to build our first CRUD REST API application using TypeORM and PostgreSQL. We will build To-Do List API in this section.
Prerequisites
I am assuming that you already know how to install a local development environment for Node.js, have PostgreSQL installed, and @nestjs/cli installed. If you not installed @nestjs/cli yet, you can read my previous post.
Create a NestJS Project
Let’s create a new project by run the following command:
$ nest new todo-list-app
$ cd todo-list-app
Environment Variables
There is a crucial thing to running our application is to set up environment variables. By using them to keep configuration data (database credentials, etc.), we can make configuration easily. It’s easier to keep sensitive data from being committed to repository.
In NestJS, we have a ConfigModule that we can use for read the configuration data. It uses dotenv behind the scene. To use ConfigModule, we need to install @nestjs/config. Use the following command to install:
$ npm install @nestjs/config
or if you using yarn:
$ yarn add @nestjs/config
After that, we need to create a .env file at the root of our application, so we can inject them into ourConfigService.
POSTGRES_HOST="localhost"
POSTGRES_PORT=5432
POSTGRES_USER="myuser"
POSTGRES_PASSWORD="mypassword"
POSTGRES_DB="todolist_app"
And then, we need to add ConfigModule.forRoot() at app.module.ts.
import { Module } from "@nestjs/common";
import { ConfigModule } from "@nestjs/config";
import { AppController } from "./app.controller";
import { AppService } from "./app.service";

@Module({
  imports: [ConfigModule.forRoot()],
  controllers: [AppController],
  providers: [AppService],
})
export class AppModule {}
To prevent any error when our application run, we need to validating our environment variables. We gonna use Joi to define a validation schema.
$ npm install joi @types/joi
if you using yarn:
$ yarn add joi @types/joi
Let’s modification app.module.ts for adding validation schema.
import { Module } from "@nestjs/common";
import { ConfigModule } from "@nestjs/config";
import { AppController } from "./app.controller";
import { AppService } from "./app.service";
import * as Joi from "joi";

@Module({
  imports: [
    ConfigModule.forRoot({
      envFilePath: ".env",
      validationSchema: Joi.object({
        POSTGRES_HOST: Joi.string().required(),
        POSTGRES_PORT: Joi.number().required(),
        POSTGRES_USER: Joi.string().required(),
        POSTGRES_PASSWORD: Joi.string().required(),
        POSTGRES_DB: Joi.string().required(),
        PORT: Joi.number(),
      }),
    }),
  ],
  controllers: [AppController],
  providers: [AppService],
})
export class AppModule {}
Connecting application with PostgreSQL using TypeORM
To connecting the application with our database, we need to define a connection between application and database. To do that, we need to install TypeORM and PostgreSQL dependencies. Use the following command to install:
$ npm install @nestjs/typeorm typeorm pg
if you using yarn:
$ yarn add @nestjs/typeorm typeorm pg
I recommend you to create a database.module.ts, so it would be easier to make config for database. It will look like this:
import { Module } from "@nestjs/common";
import { ConfigModule, ConfigService } from "@nestjs/config";
import { TypeOrmModule } from "@nestjs/typeorm";
import { join } from "path";

@Module({
  imports: [
    TypeOrmModule.forRootAsync({
      imports: [ConfigModule],
      inject: [ConfigService],
      useFactory: (configService: ConfigService) => ({
        type: "postgres",
        host: configService.get("POSTGRES_HOST"),
        port: configService.get("POSTGRES_PORT"),
        username: configService.get("POSTGRES_USER"),
        password: configService.get("POSTGRES_PASSWORD"),
        database: configService.get("POSTGRES_DB"),
        entities: [join(__dirname, "**", "*.entity.{ts,js}")],
        ssl: {
          rejectUnauthorized: false,
        },
        synchronize: true, //should be false at production!
      }),
    }),
  ],
})
export class DatabaseModule {}
After that, we need to import our DatabaseModule at app.module.ts.
import { Module } from "@nestjs/common";
import { ConfigModule } from "@nestjs/config";
import { AppController } from "./app.controller";
import { AppService } from "./app.service";
import * as Joi from "joi";
import { DatabaseModule } from "./database.module";

@Module({
  imports: [
    ConfigModule.forRoot({
      envFilePath: ".env",
      validationSchema: Joi.object({
        POSTGRES_HOST: Joi.string().required(),
        POSTGRES_PORT: Joi.number().required(),
        POSTGRES_USER: Joi.string().required(),
        POSTGRES_PASSWORD: Joi.string().required(),
        POSTGRES_DB: Joi.string().required(),
        PORT: Joi.number(),
      }),
    }),
    DatabaseModule,
  ],
  controllers: [AppController],
  providers: [AppService],
})
export class AppModule {}
Entity
In ORM technique, we need entity. Entity is a class maps to database table. To create it, we use the @Entity() decorator.
import { Column, Entity, PrimaryGeneratedColumn } from "typeorm";

@Entity()
class Todo {
  @PrimaryGeneratedColumn()
  public id: number;

  @Column()
  public title: string;

  @Column()
  public content: string;

  @Column()
  public f_done: boolean;
}

export default Todo;
@PrimaryGeneratedColumn() is a decorator from TypeORM that will create an integer primary key for id column and generate the value automatically as a sequence.
@Column() decorator marks property as a column.
DTO
We need to create DTO (Data Transfer Object) for help us have an easy access to request body. DTO defines the format of data that sent in a request. We gonna create DTO class for create and update our Todo.
export class CreateTodoDto {
  title: string;
  content: string;
  f_done: boolean;
}

export default CreateTodoDto;
export class UpdateTodoDto {
  id: number;
  title: string;
  content: string;
  f_done: boolean;
}

export default UpdateTodoDto;
Repository
With Repository, we can manage particular entity. Repository has some functions to interact with entity. Repository are handled by TypeORM, so we just need use the class as constructor at our TodosService module. Our TodosService will look like this:
import { HttpException, HttpStatus, Injectable } from "@nestjs/common";
import { InjectRepository } from "@nestjs/typeorm";
import { Repository } from "typeorm";
import CreateTodoDto from "./dto/createTodo.dto";
import Todo from "./entity/todos.entity";
import { UpdateTodoDto } from "./dto/updateTodo.dto";

@Injectable()
export class TodosService {
  constructor(
    @InjectRepository(Todo) private todoRepository: Repository<Todo>
  ) {}

  // find all
  getAllTodos() {
    return this.todoRepository.find();
  }

  // find by id
  async getTodoById(id: number) {
    const todo = await this.todoRepository.findOne(id);
    if (todo) {
      return todo;
    }

    throw new HttpException("Todo not found", HttpStatus.NOT_FOUND);
  }

  // create
  async createTodo(todo: CreateTodoDto) {
    const newTodo = await this.todoRepository.create(todo);
    await this.todoRepository.save(newTodo);

    return newTodo;
  }

  // update
  async updateTodo(id: number, post: UpdateTodoDto) {
    await this.todoRepository.update(id, post);
    const updatedTodo = await this.todoRepository.findOne(id);
    if (updatedTodo) {
      return updatedTodo;
    }

    throw new HttpException("Todo not found", HttpStatus.NOT_FOUND);
  }

  // delete
  async deleteTodo(id: number) {
    const deletedTodo = await this.todoRepository.delete(id);
    if (!deletedTodo.affected) {
      throw new HttpException("Todo not found", HttpStatus.NOT_FOUND);
    }
  }
}
Controller
Controller have responsibility to handle incoming requests and return responses to client. Let’s create our TodosController. Our controller will look like this:
import {
  Body,
  Controller,
  Delete,
  Get,
  Param,
  Post,
  Put,
} from "@nestjs/common";
import CreateTodoDto from "./dto/createTodo.dto";
import { TodosService } from "./todos.service";
import { UpdateTodoDto } from "./dto/updateTodo.dto";

@Controller("todos")
export class TodosController {
  constructor(private readonly todosService: TodosService) {}

  // get all todos
  @Get()
  getTodos() {
    return this.todosService.getAllTodos();
  }

  // get todo by id
  @Get(":id")
  getTodoById(@Param("id") id: string) {
    return this.todosService.getTodoById(Number(id));
  }

  // create todo
  @Post()
  async createTodo(@Body() todo: CreateTodoDto) {
    return this.todosService.createTodo(todo);
  }

  // update todo
  @Put(":id")
  async updatePost(@Param("id") id: string, @Body() todo: UpdateTodoDto) {
    return this.todosService.updateTodo(Number(id), todo);
  }

  //delete todo
  @Delete(":id")
  async deleteTodo(@Param("id") id: string) {
    this.todosService.deleteTodo(Number(id));
  }
}
After that, we need to import our services to TodosModule. Let’s create and it will look like this:
import { Module } from "@nestjs/common";
import { TypeOrmModule } from "@nestjs/typeorm";
import Todo from "./entity/todos.entity";
import { TodosService } from "./todos.service";
import { TodosController } from "./todos.controller";

@Module({
  imports: [TypeOrmModule.forFeature([Todo])],
  controllers: [TodosController],
  providers: [TodosService],
})
export class TodosModule {}
And for the last step, we import our TodosModule to app.module.ts just like we import our DatabaseModule before.
Running and testing the apps
Let’s running the application with command yarn run start.
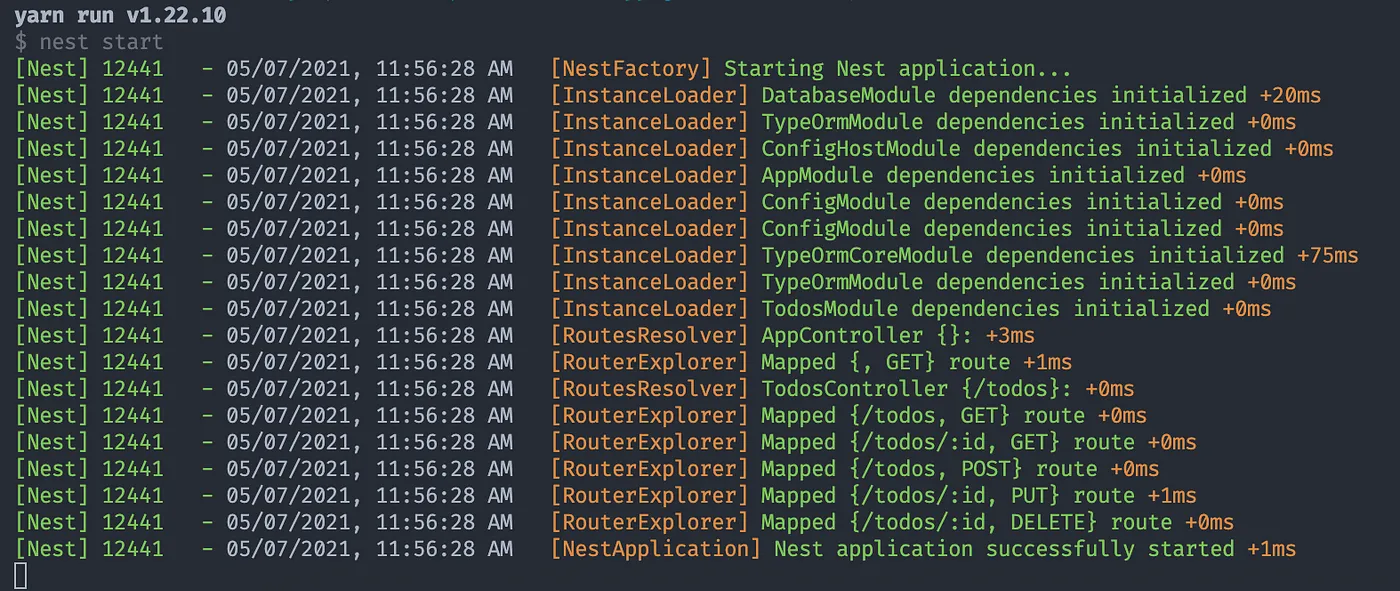
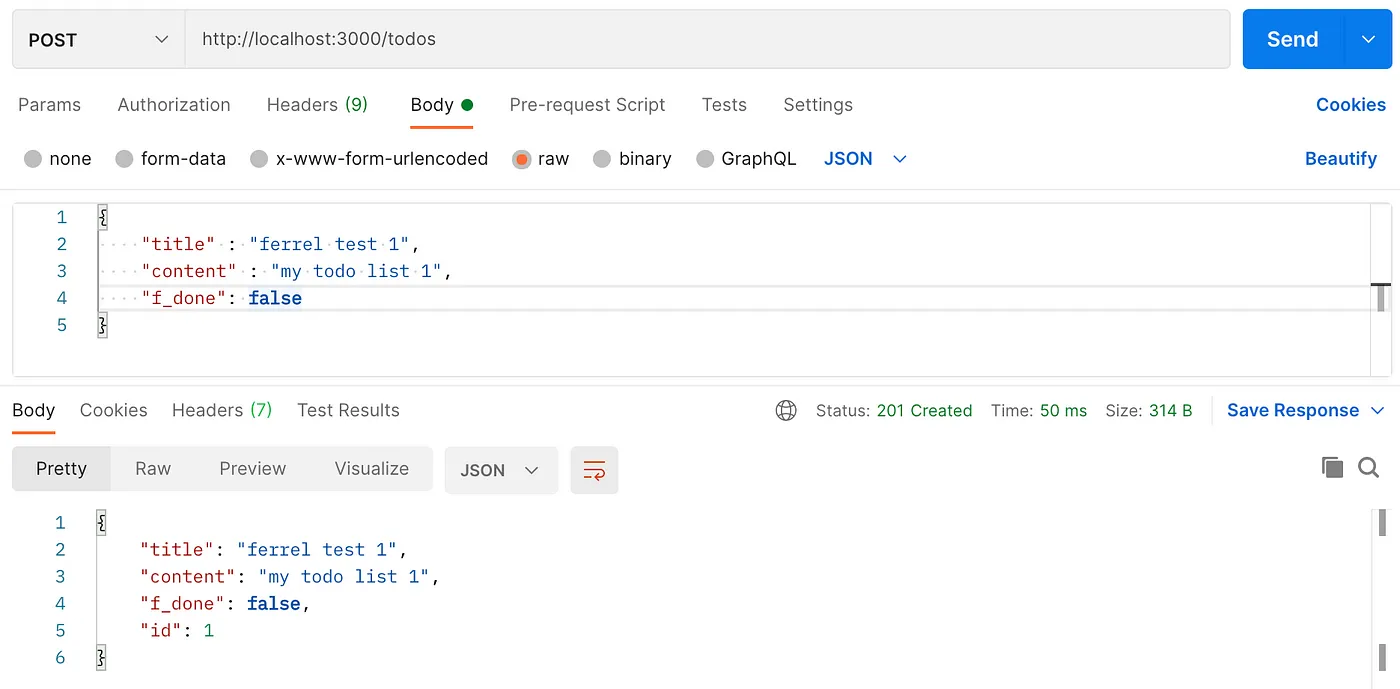
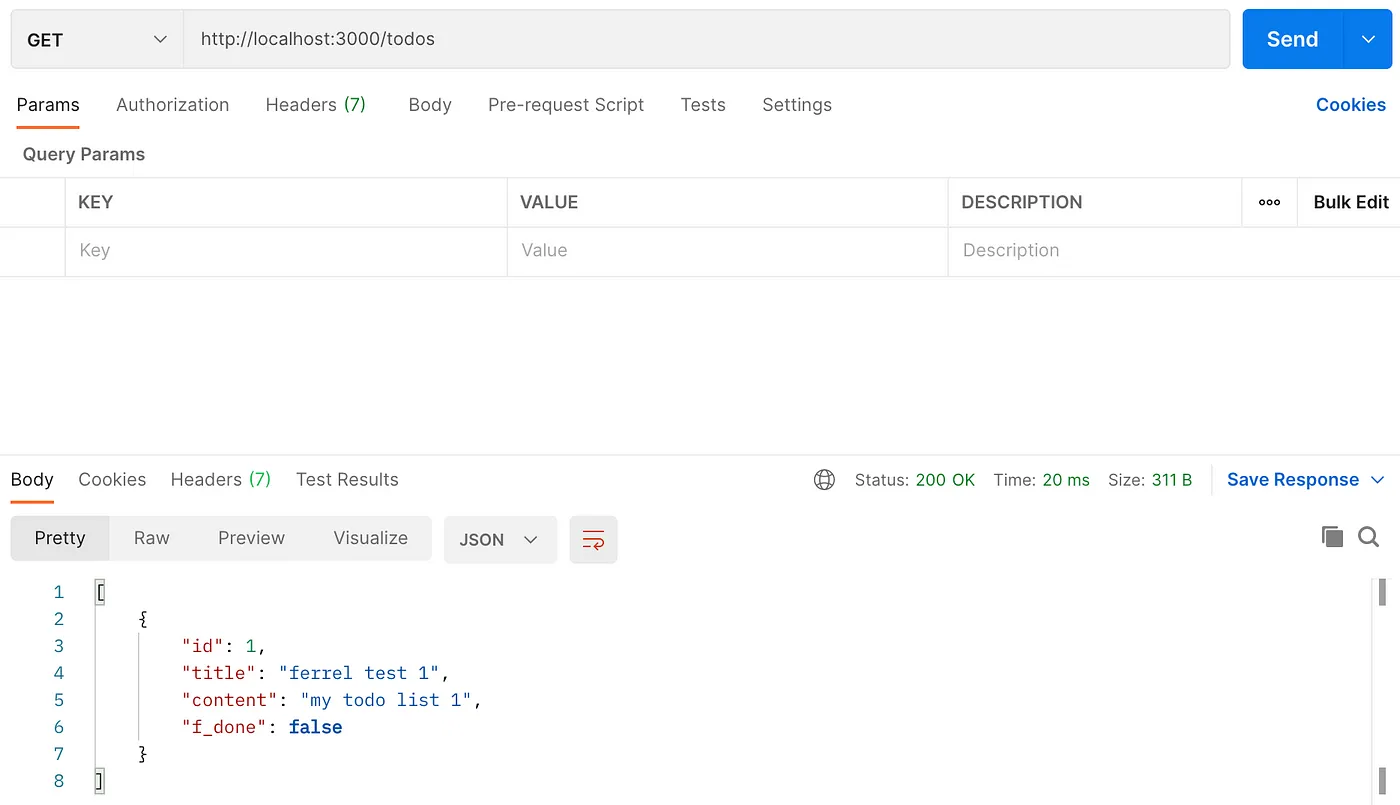
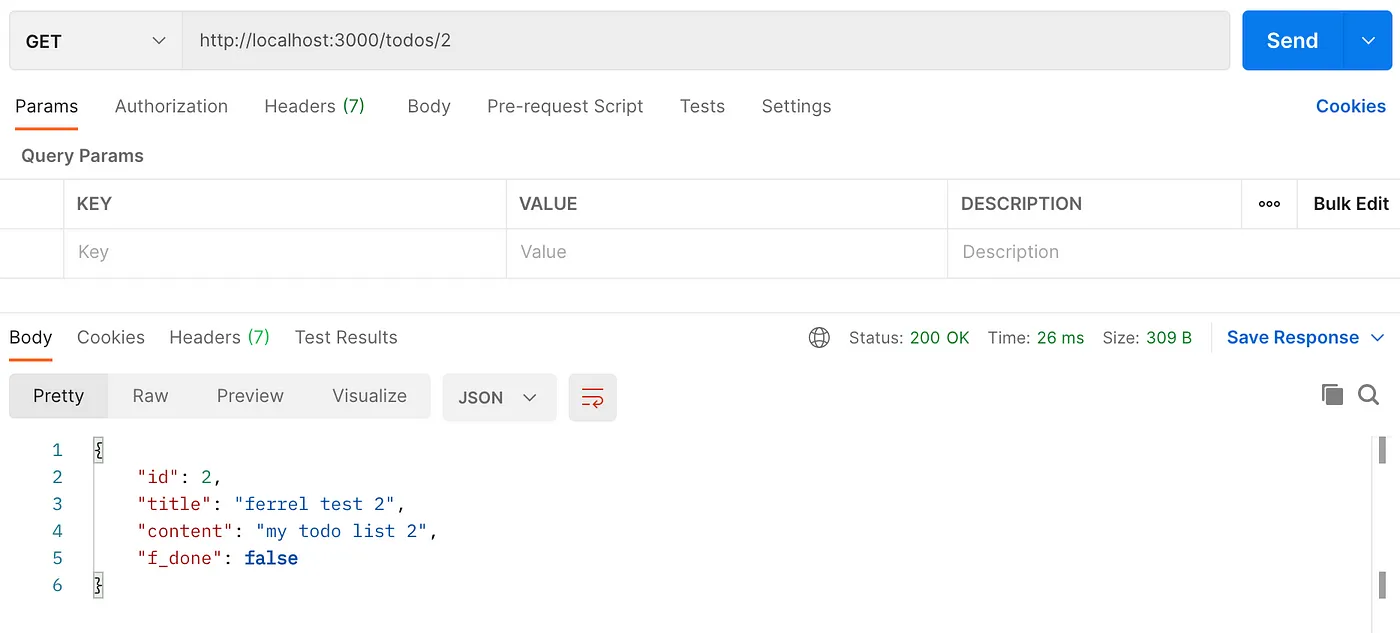
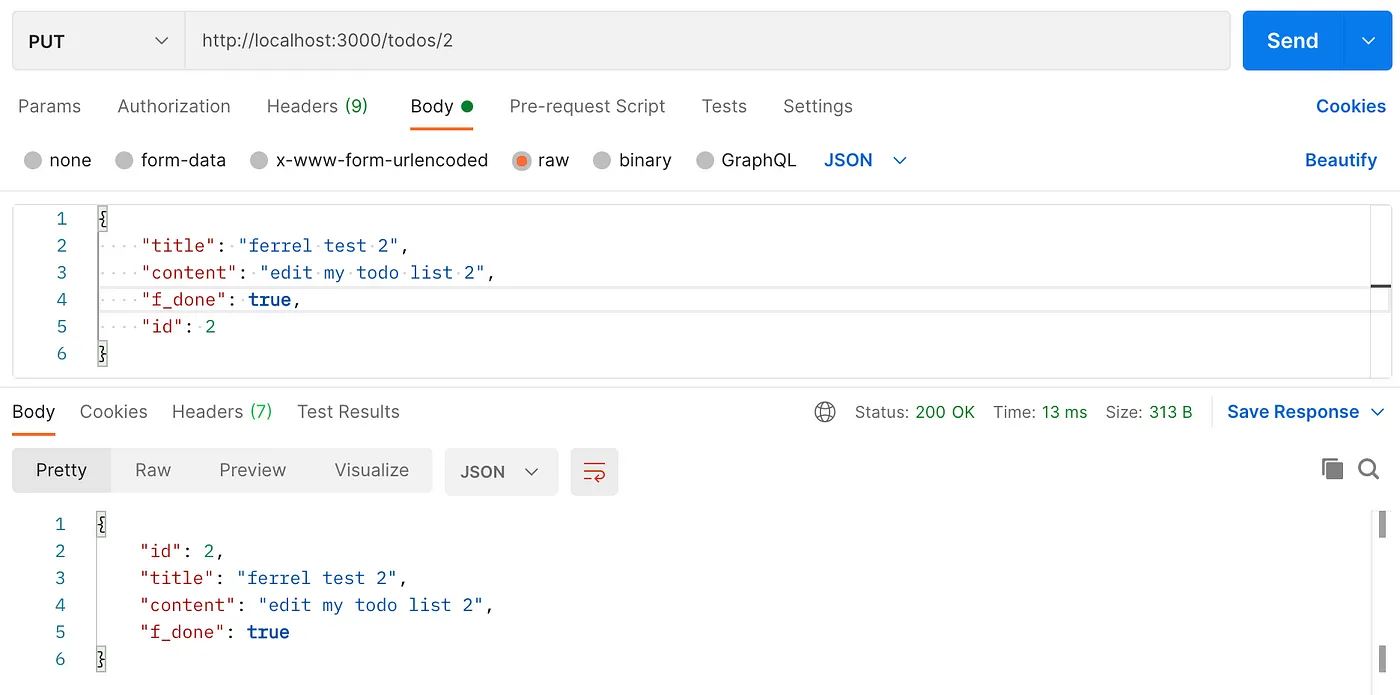
After that, we can test our apps using Postman.

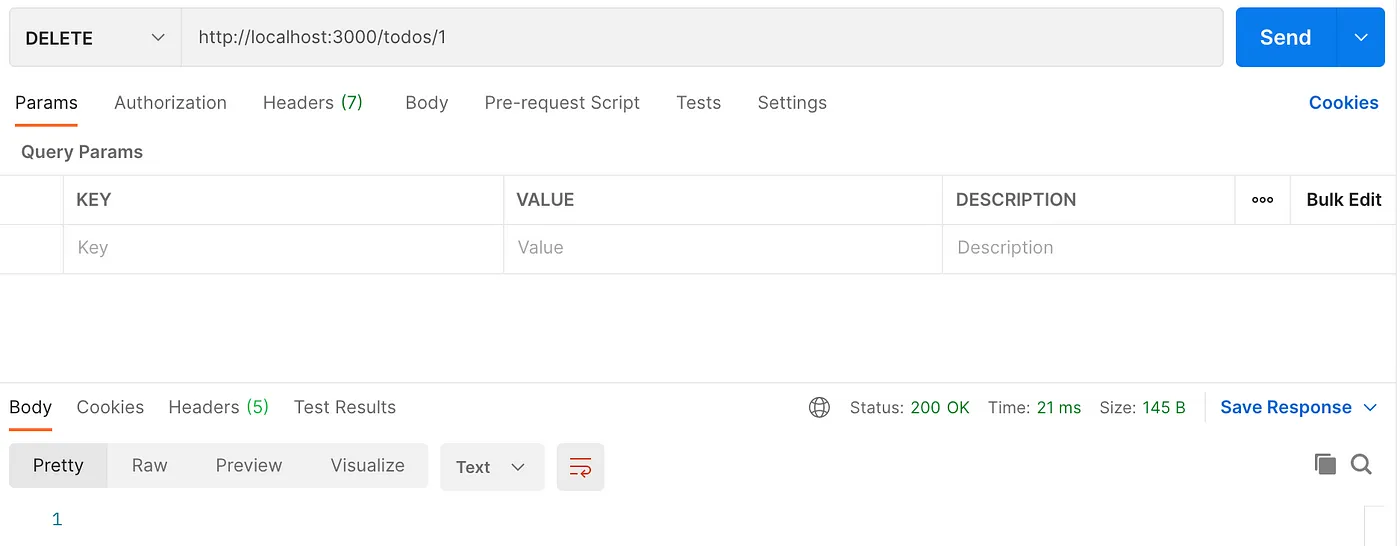
When delete a record, our application doesn’t send any response body. So how we know that the record already deleted? In this example, we just get feedback HttpStatus 200 which is the API is working well and delete the record.
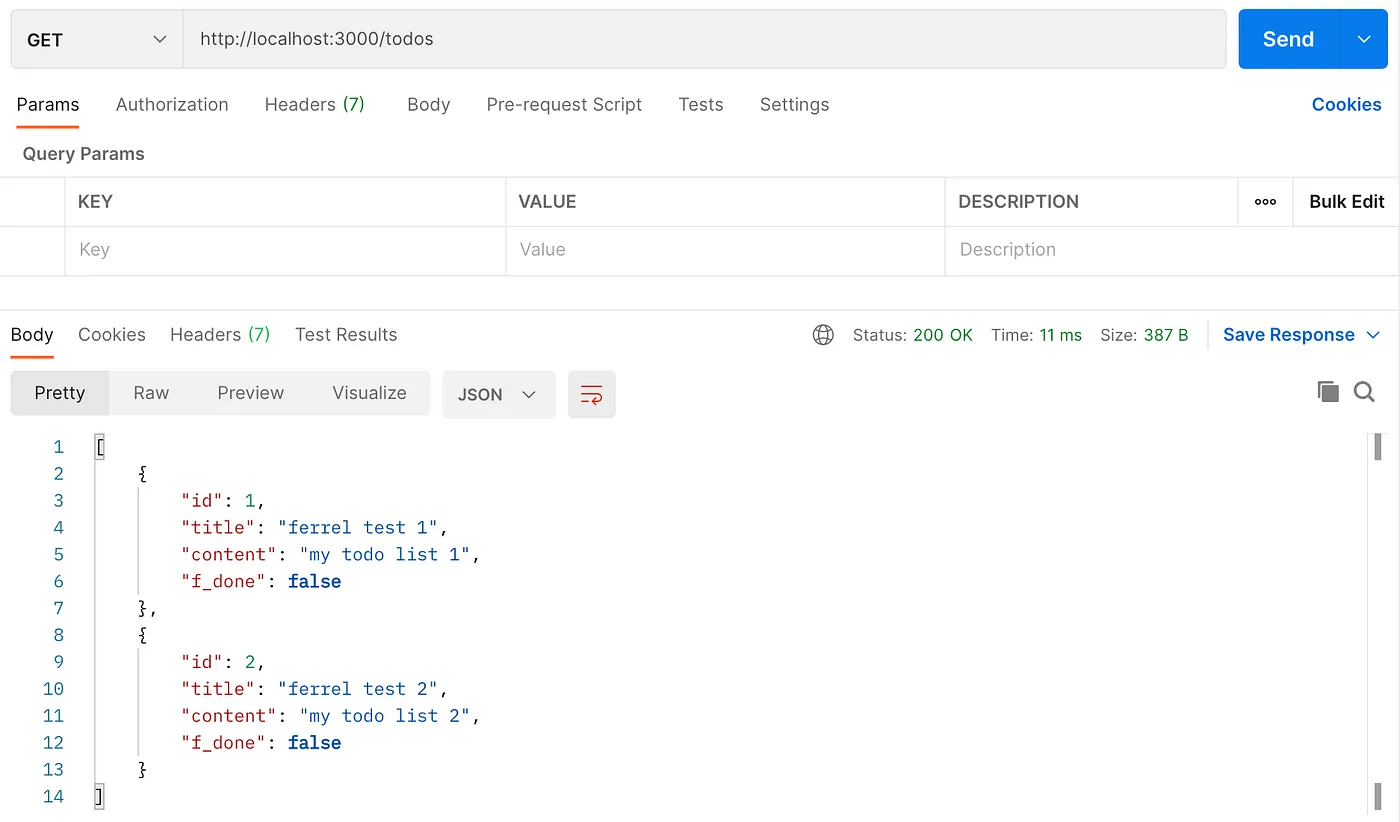
After first record already deleted, and second record already modified, our latest data look like this:
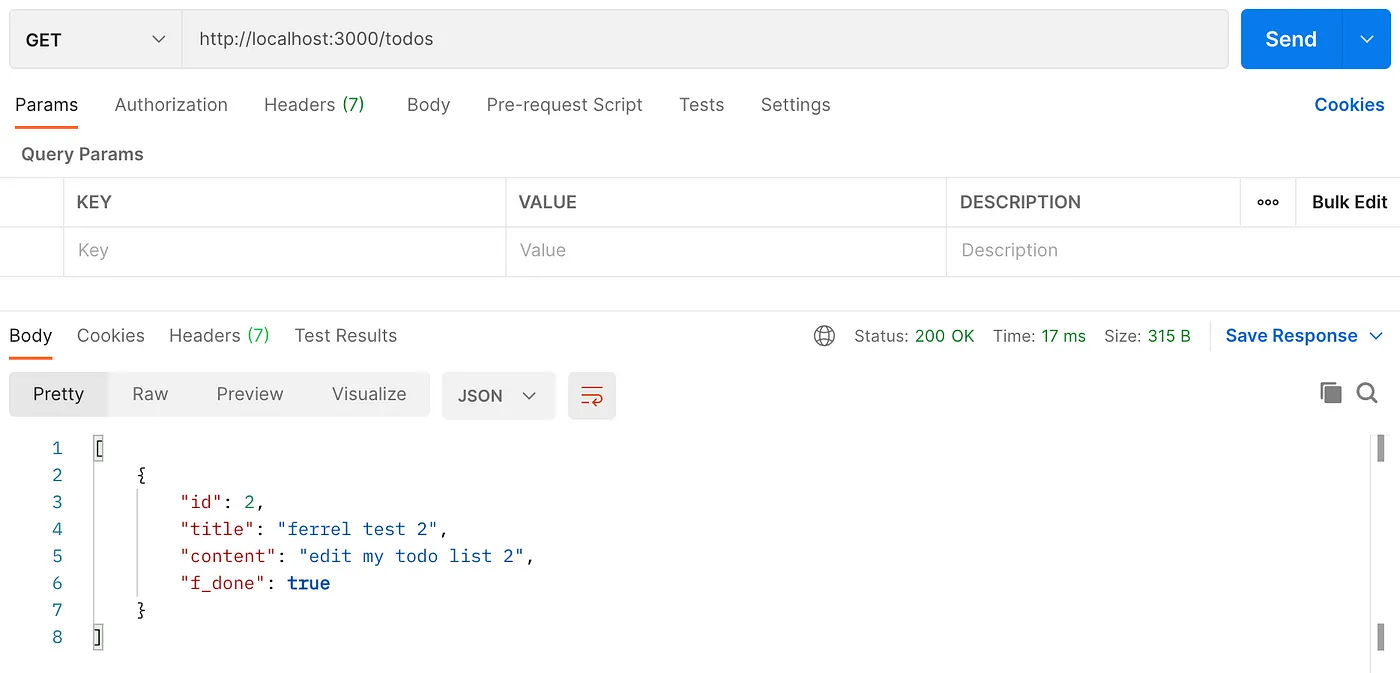
So, all function on our apps already tested, and it works well. You can test for negative cases by yourself so you will know how the apps gonna act when it happens.
I hope with this tutorial, me and you guys who read this could get started working with NestJS, TypeORM, and PostgreSQL. If this tutorial help you and you enjoy it, please share to help others find it!